Thanks for visiting this site, but it is no longer being updated. I've moved on over to http://www.mediapundit.net/ and I invite you to join me over there from now on. Thanks for your understanding.
Deviant Art is a cool site that hosts all types of art, from simple digital photography to virtually all forms of digital creations. I placed a few 3D renderings there earlier this year, and I'm back with a new set of CGI, this time utilizing only Adobe Photoshop. Photoshop is enormously powerful, so much so that you will often be elated to find a new technique for making your stuff look 10x better than it did sixty seconds ago, only to later find that even though you know exactly how you accomplished the feat (usually via layer typing), you come to find that you can't reproduce it. I hate that.
I like space scenery, so that is what I've been working on lately. Creating a decent star field in Photoshop is fairly easy, simply a mater of a black background with noise on it (via Filter->Noise->Add Noise at about 7% monochromatic Gaussian.) Once the noise is there, you go to Image->Adjustments->Levels. You move the right-most slider way way over to the left until you have almost nothing but stars -- a very full field of white dots, then you move the middle slider to the right until enough of the noise disappears, and you have a happy mix between dark grey stars, and a moderate amount of bright ones. You don't mess with the left-most slider, just the other two. Move them all over the place to find a happy medium.
Naturally, the next thing you want is a nebula, galaxy, sun, or something you'd see in space. Nebula are hard as hell to make, because unlike stars, there is nothing outside of plugins to generate them. You have to use all of the tools available, and also have good sense of color and style. I don't, so I can't make something like the Nebula in this tutorial. I tried, I couldn't even get the first step to look good.
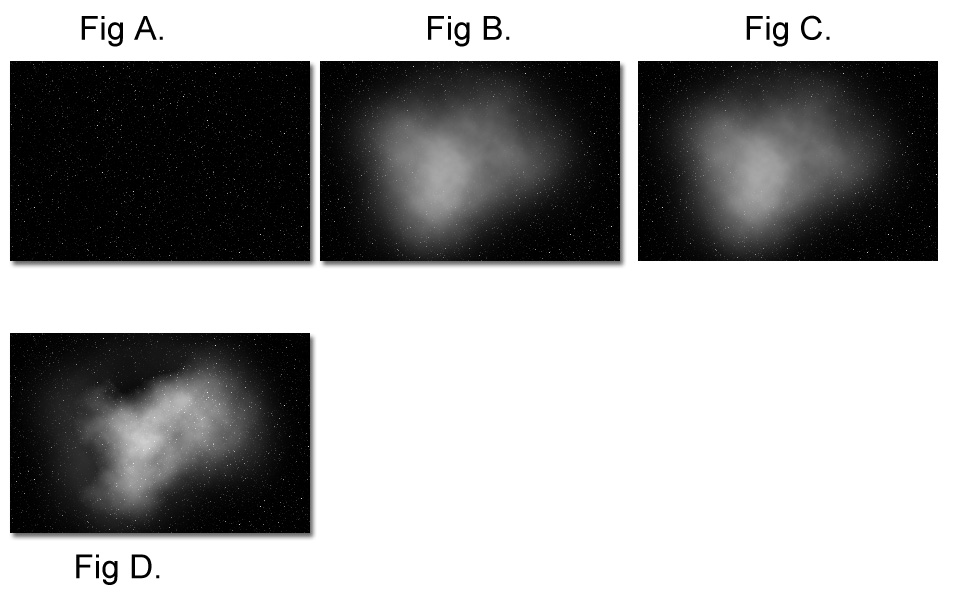
But there are other methods, using generated clouds (Filter->Render->Clouds) you can fill the screen with very fake looking clouds. This is where layer styling comes into play. Observe. In Figure A., I have a star field. I made a new layer (set to normal), made a selection mask in an odd blob shape (feather set to something like 25px anti-aliased) and then rendered a cloud in black and white. I set the layer type to Screen in figure C., then did it again on another layer (fig. D: new layer, same selection mask, same colors, another b&w cloud), but set that layer to Linear Light, which gave the cloud much more definition.
Randomly adding new layers with new clouds set to different types is how you get the best effects, but blurring and erasing come in very handy as well. Very small type-3 (as in the third type in the list) of lens flares on the right layer at the right size make very pretty highlights. Now this post is not a tutorial, so don't bother trying to make something like these based only on what you've read here, this isn't enough. Check out some of these projects below.
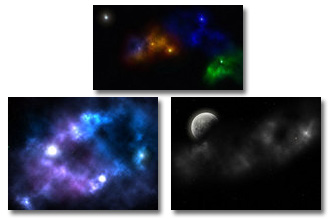
You can see the larger images here, here, and here. My Deviant Art page is here, with other work. Don't forget to visit the scraps page, some of my new work with the moon is there. The moon is a picture of the real thing (source: 3352x3316 for excellent clarity), greatly modified to add depth and beauty (and I don't mean pretty, I mean eye candy.) Nifty, eh?
Like this post? Subscribe to RSS, or get daily emails:
Got something to say? Post a Comment. Got a question or a tip? Send it to me. If all else fails, you can return to the home page.